The PPAP (Production Part Approval Process) Dimensional Test Results Report provides a record of the dimensional data taken from product manufactured during the production run. A ballooned part drawing is required as part of the design record, and is referenced in the dimensional test results. The Dimensional Results Report for element 9 must include:
Generally, these requirements are met by including a ballooned (or bubbled) part drawing and a spreadsheet that includes all of the dimensions/specifications and the test results.
The AIAG PPAP Manual does not specify how many parts should be inspected. However, the industry standard we see is 6 pieces from the first lot. They do not need to be the first 6 pieces, and the master sample does not have to be the first one you produce.
Want to learn more about PPAP? Read about all 18 elements and get our free PPAP Excel template.
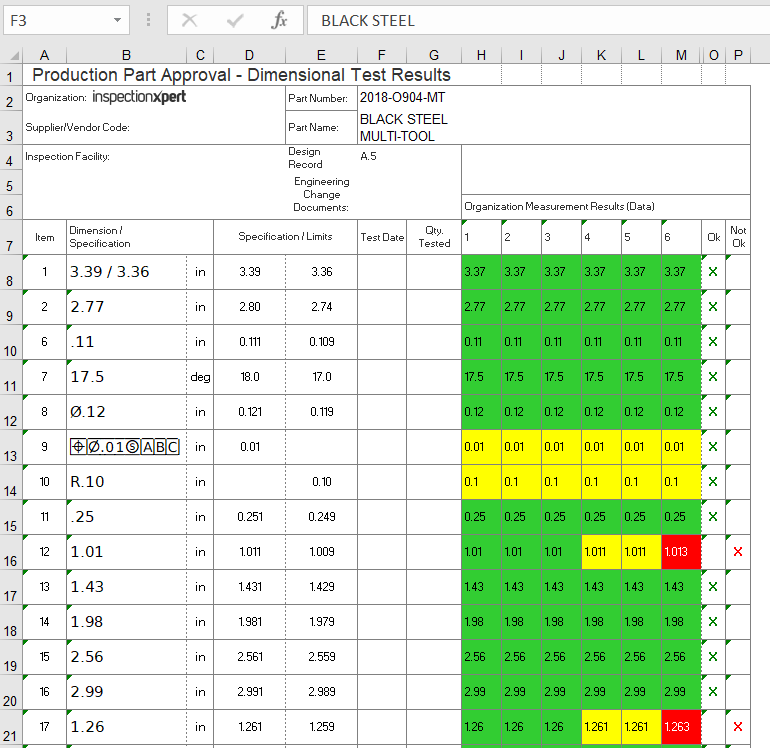
Below is an example of the Dimensional Test Results. It shows:
Depending on the requirements of your customer, you may not need all these fields, or additional fields may be required, such as testing more parts.

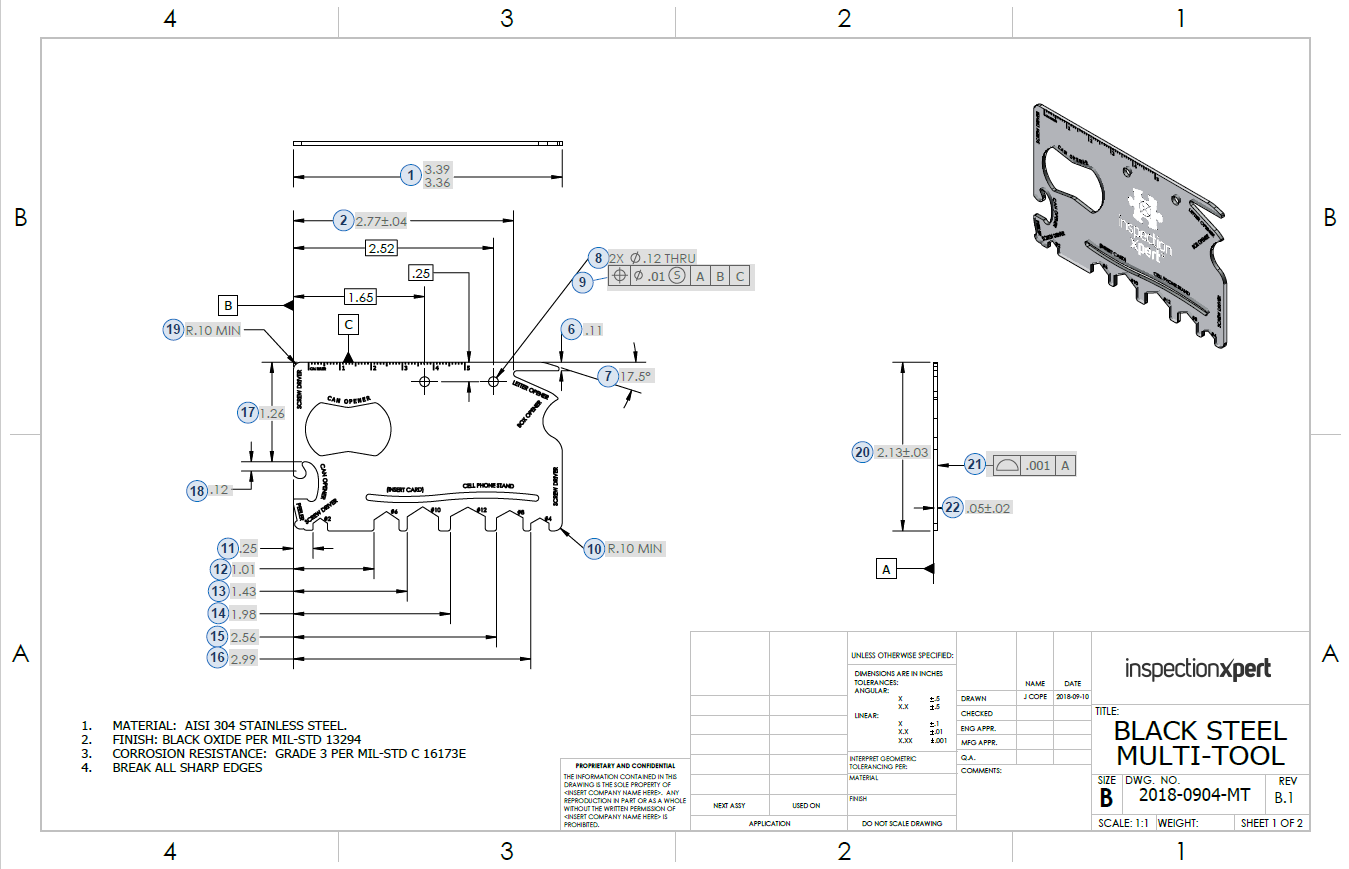
Below is an example of the corresponding part drawing, which has each dimension ballooned.

Depending on the requirements of your customer, instead of the above Dimensional Results Report, you may be able to submit a checked print where the results are legibly written on a part drawing.
With InspectionXpert, you can balloon part drawings, capture feature data, and instantly publish the data to a PPAP Dimensional Results Report. Watch this 90-sec video to see how it works and learn more about InspectionXpert here.
Published October 17, 2019. Updated August 13, 2021.
Copyright 2025 InspectionXpert Corporation, is a wholly owned subsidiary of Ideagen Inc, All Rights Reserved